valentines day

Friday fingers // Ombre' nails


Ombre' nails are a great way to fade into things. So I thought this would be the perfect way to begin February! This mani is actually pretty easy to achieve. I must say that the hardest part when doing these, was the fact that I got a wedgie mid way. Wet nails and wedgies are a terrible mix.

Supplies


#1. Base coat
#2. Revlon Bare bones 300
#3. Pink polish
#4. Make up sponge
#5. Top coat


Step one: Apply your base coat and base color. Let them dry completely. If you touch it and your finger print shows, they're not ready.

make a gif image

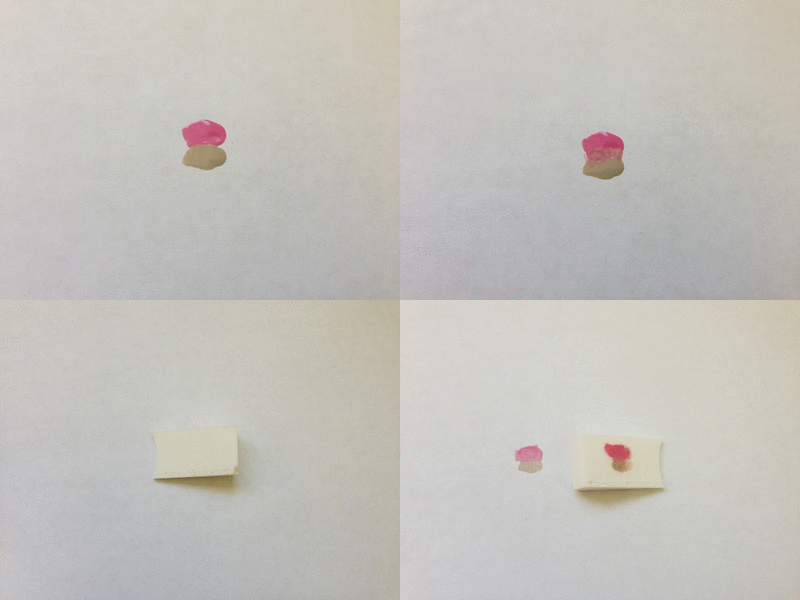
Step two: On a paper, apply the pink and gray polish. Then you can either mix the two colors with a toothpick or place the sponge over the two colors and slightly move the sponge up and down.


Step three: Before dabbing the sponge onto your nail make sure the pink polish is on top (I can't tell you how many times I almost did a switcharoo on accident). Then rock the sponge back and forth. If you want more of a pink hue dab the sponge onto some pink and back onto your nail.


Step five: Top coat them & done. I added a wee bit of glitter on my ring finger to give it some pizzaz. Although it can hardly be seen..


Cheers!
 Instagram // RSS


Tea for two printable // Valentines Day


I wish coffee was my thing. I feel like those that drink it are always on a mission, and have got it all together. But coffee just isn't my thing. Hot chocolate & teas & really anything that sounds lazy, those things got my name written all over it. I decided changing up the tea labels would be a sweet gesture for valentines day. Something special but still completely easy & stress free. Downloads for the templates are in the supplies section. Enjoy!

Tea Tags:
-Hot stuff
-You warm my heart
-Your sweet
-You blow me away


Supplies:

#1. Scissors 
#2. Glue stick 
#3. Heart tea tags on card stock paper
#4. Tea bag envelopes on card stock paper
#5. Tea bags
#6. 15 minutes of your time
#7. Oh & this 


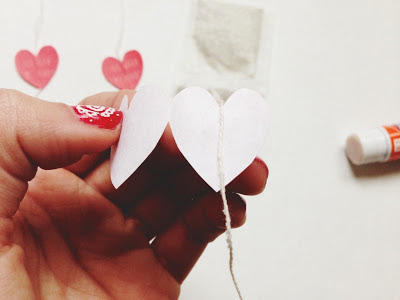
Step one: Once you cut out the heart tags, apply glue, and place string in the center.


Step two: Now its time to seal them up in an envelope! When you do so, glue the sides first then the top flap. I placed a book on top to keep the envelope from opening up. After two minutes or so the packet should be secure.


Step three: 
Gather up your tea packets & tie em up with some string. 


Or pour some hot water and share with your valentine.


Cheers!
 Instagram // RSS


A knotty Valentines day card


I'm aware Valentines day is a month away but I just cant help & get a head start. Especially when I figured out a way to incorporate this save the date card that I've been eying. The timing couldn't have been more perfect. This would even be perfect as an anniversary card! Anything romantic really.


Supplies

1. My PDF printable 
2. Scissors 
3. 9 inches of twine 
4. Exacto or cutting tool
5. Glue stick
5. 15 minutes of your time


Step one: After cutting out the PDF and carefully folding it in half, make a hole through the two sheets using your cutting tool. After doing so glue the two sheets together.


Step two: Place the twine through and make a knot. 


Step three: Before doing the same to the other side, make a loose knot in the middle of the card.


Make sure when you give your card to your valentine that the knot in the middle is loose. That way when they open it up it will form the knot. Click on the download bar below to make your own!


Cheers!
 Instagram & RSS


Related Posts Plugin for WordPress, Blogger...
Back to Top
Pin It button on image hover